
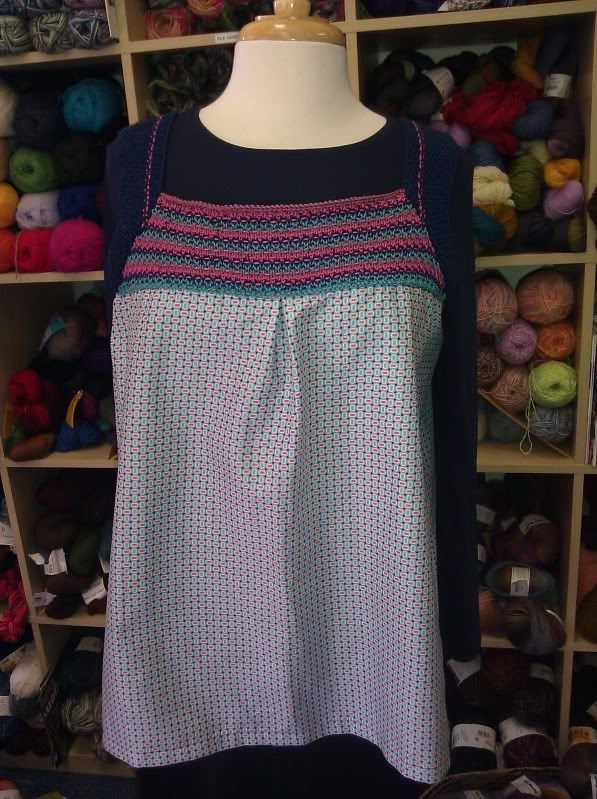
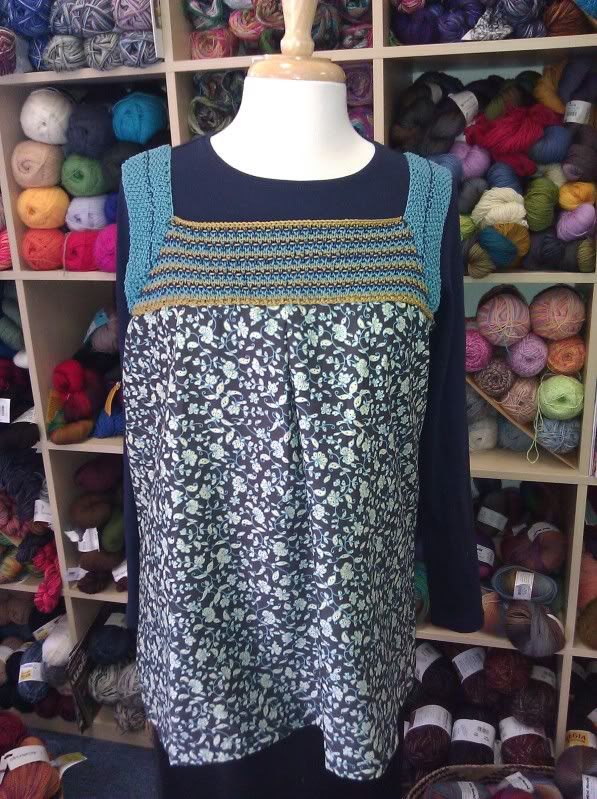
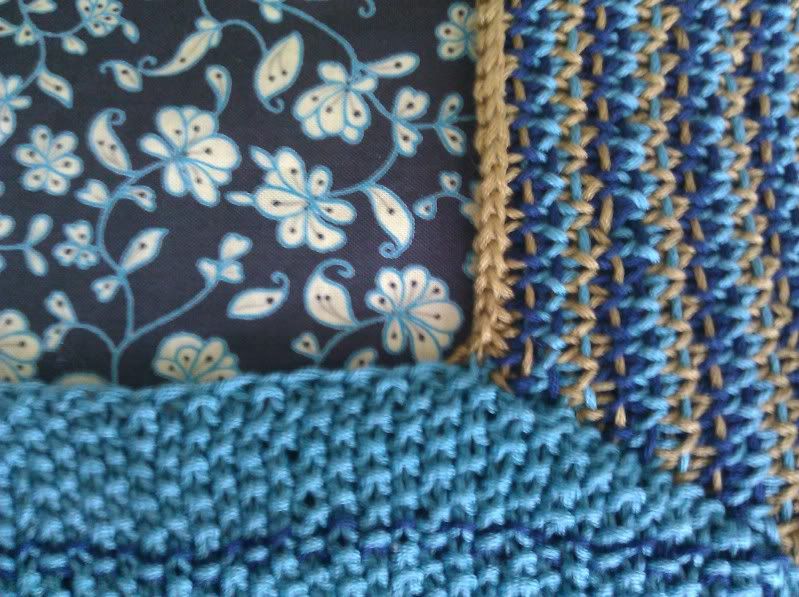
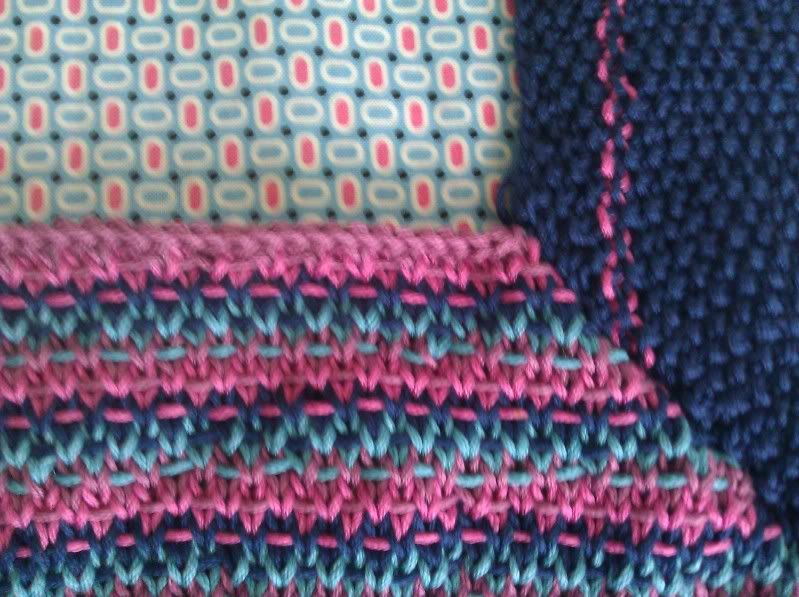
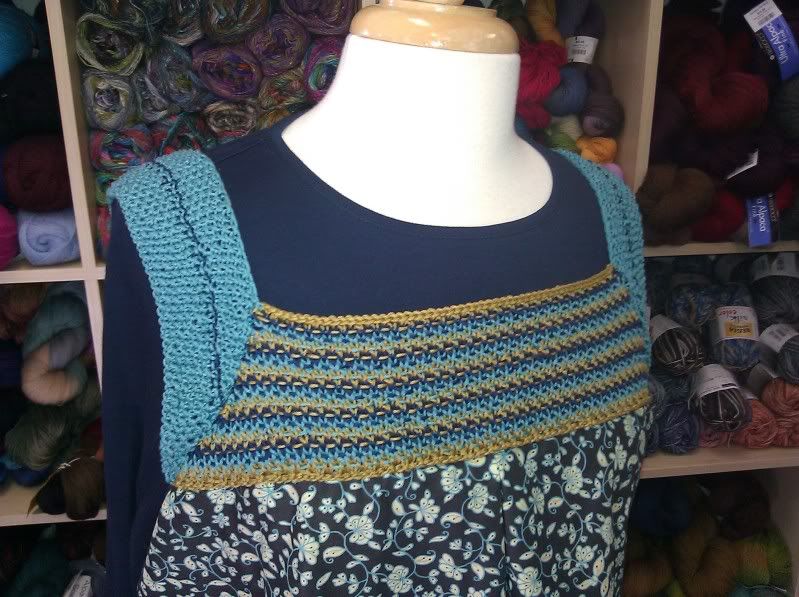
We are on to Week 2 and Project 2. I bring you the backbone of my summer wardrobe. It is originally worked in Berroco brand yarns (which I generally love). However, I already had a color palette that I wanted to play in another yarn. This tank uses a couple of fun but easy stitches, seed stitch and half linen stitch, to keep things lively. Remember, the chosen yarn, Tahki Cotton Classic LITE is 10% off for this following week.
Week of June 10 thru 16:
Project: Bell by Cirilia Rose
Needles: US 5/3.5mm for the straps and US 6/4mm for the body
Time Plan:
Night 1 - Strap 1 (maybe even cast on for Strap 2)
Night 2 - Strap 2
Night 3 - Front Bodice
Night 4 - Back Bodice
Night 5 - Sewing up the knitted portions and weaving in ends
Night 6 - Sewing up the fabric portions and final assembly
Notes:
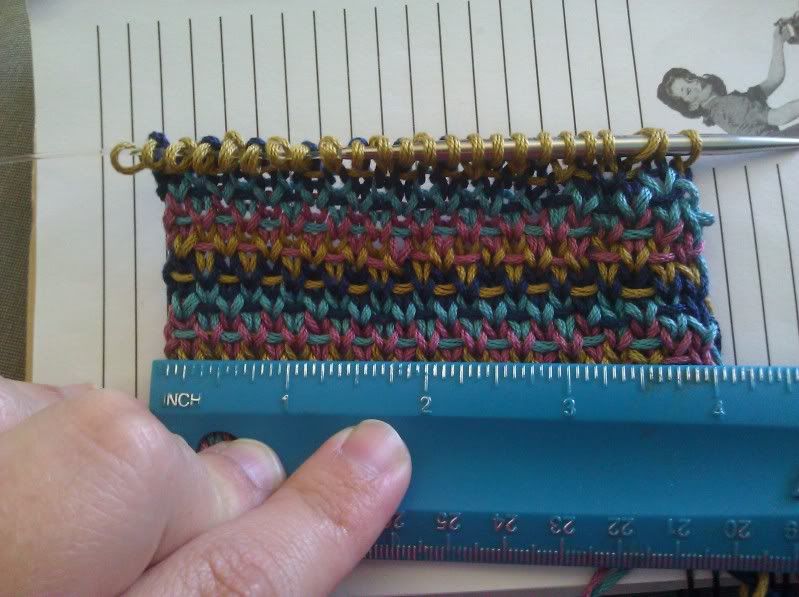 a) MAKE A SWATCH. We are substituting yarns which means that making a swatch to ensure correct gauge is extra important. This yarn is a little bit lighter weight than the original yarns but it worked out when I swatched. With luck, my needle size worked out the same as the pattern and I could proceed with confidence.
b) When casting on for the bodice portions, I cast on one extra st. This extra gives you an odd number and makes the last st into a knit.
c) Working the decreases in the bodice section may throw the stitch pattern off. Make sure that you are alternating the column of stitches that you are slipping on each right side row. I would call this forcing it into pattern.
d) I chose the 48 inch directions when making my knitted portions, because I wanted 4 inches of positive ease.
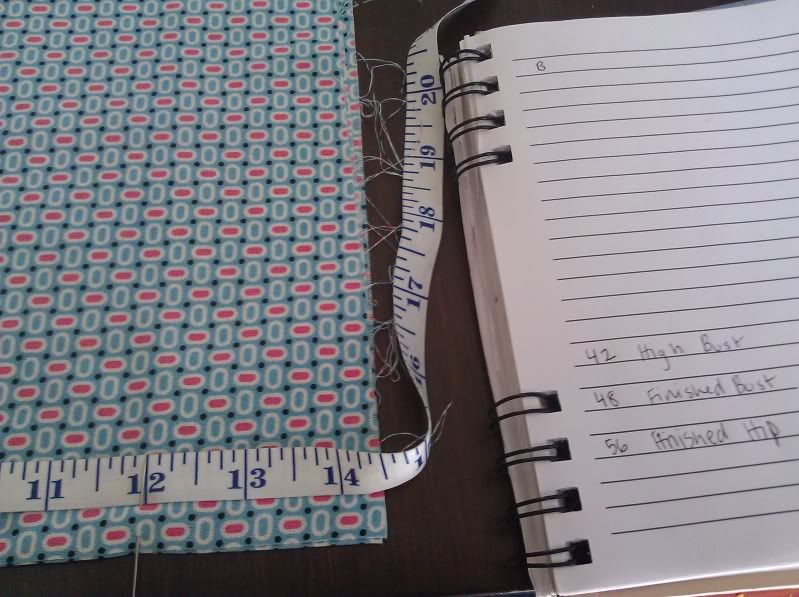 e) Regarding the fabric portion:
*I measured my high bust (make sure to look at Step 1, if following that link) to see how wide I needed the top hem to be. I measure 42 inches there and 44 inches at my bust.
*I purchased 3/4yd (from Quilt Ventura, our neighbor). I laid the fabric out, positioning the top hem along the fold and the bottom hem along the selvedge edge. Then, I made an a-line cut; the bottom hem remained 27 inches and I slanted the line so that the top edge would go down to 24 inches, respectively leading to 54 inches and 48 inches around.
*With a seam allowance of 1/2 inch on each side seam the top hem is now 47 inches, leaving a 5 inch difference from my high bust measurement. To eat up these 5 inches, I used up 2 1/2 inches in a pleat on each the front and back.
f) I always attach knitted portions to fabric by hand! Get some matching sewing thread and go to it. I simply used small running stitches to get the job done.
I need a little break after whipping up these two, but I plan on making at least two more that only use two colors each. You will have plenty of yarn to make a few combinations after you make your first one.
I first saw this pattern in Berroco's weekly email, Knitbits, two summers ago and am very glad to have knocked it off my to do list. Here is the direct link to the pattern where you will see a sign up for that email list. I look forward to it each Friday morning. For the crocheter, there is a sister top, Nell.
If you are viewing this post far from driving distance from our store, then please remember that we will happily take phone orders. Here is a link to a color card to ease your color choosing process. Call us @ (805) 654-9500. (There will be a postage charge for shipping.)
P.S. If this idea really lights you up, then you can also join a ravelry group here.
No comments:
Post a Comment