Friday, July 29, 2011

Week 9 of 52: sev[en] circles cowl/necklace


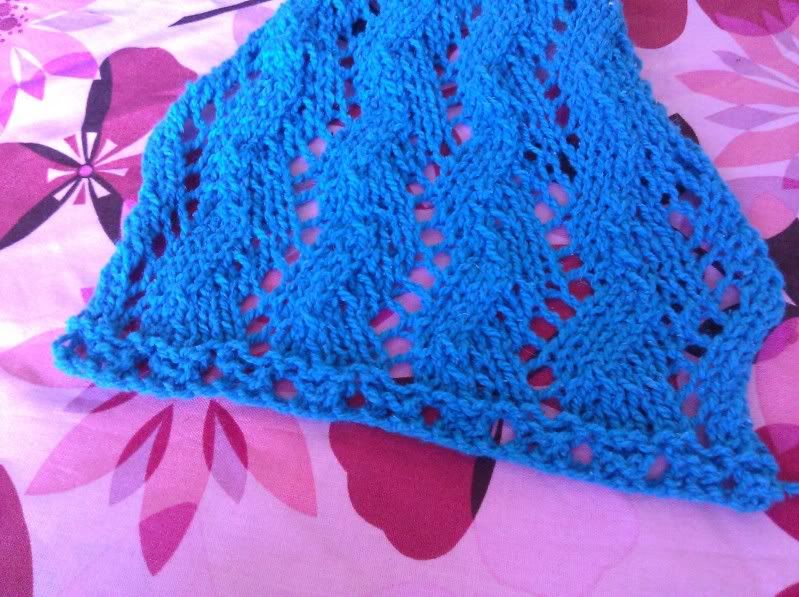
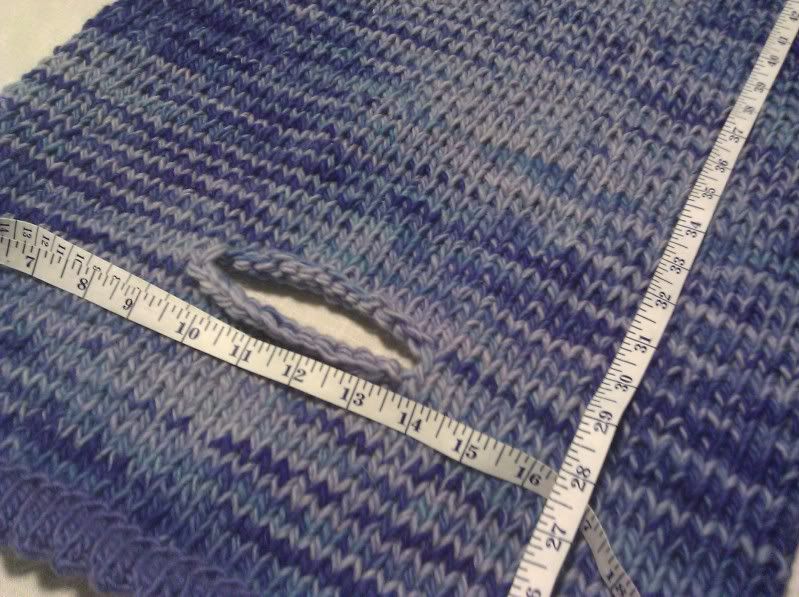
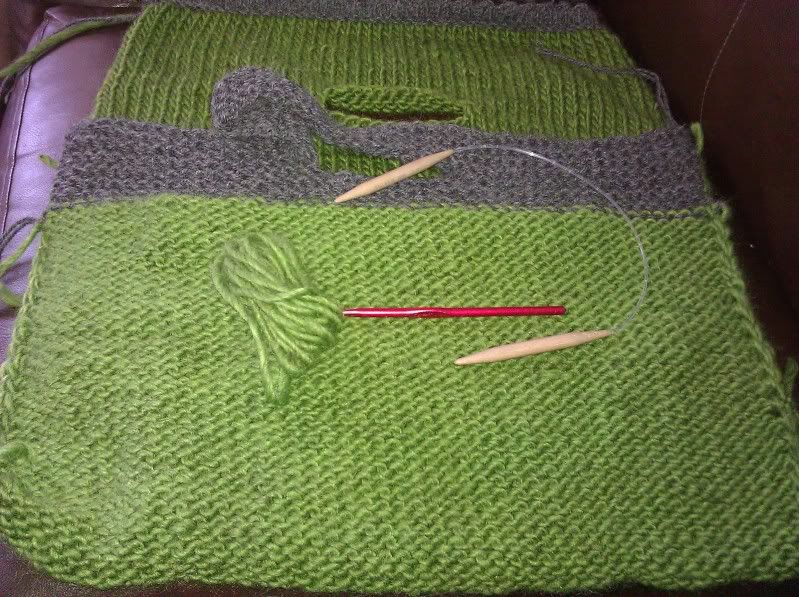
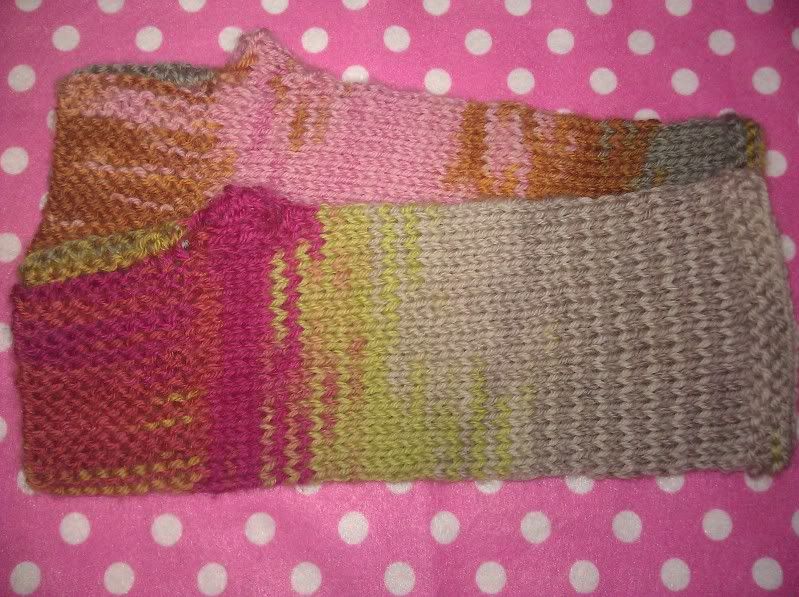
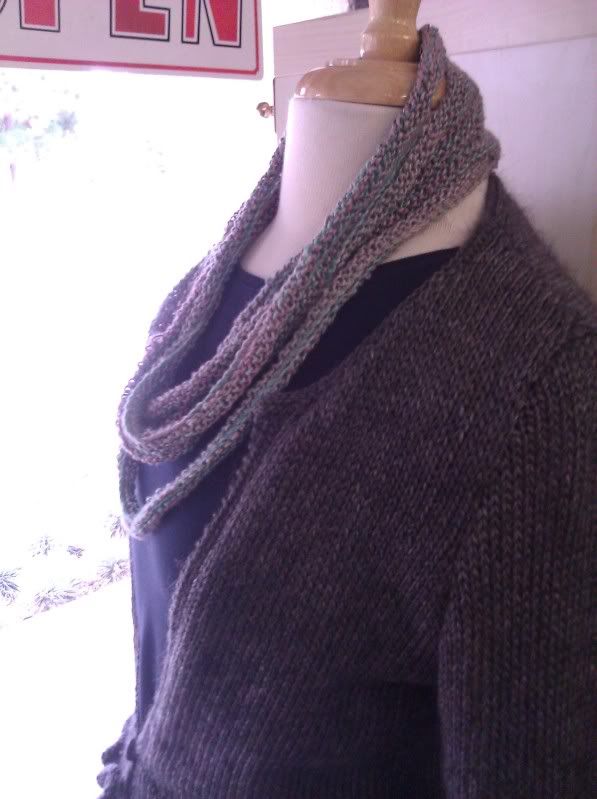
This week's project was a big hit last summer, but I never got around to making my own. Terry exposed us all to sev[en] circles and it is a great quick project. It is form and function all in one as it is a beautiful piece of jewelry as well as a device of warmth.

Week of July 29 thru August 4:
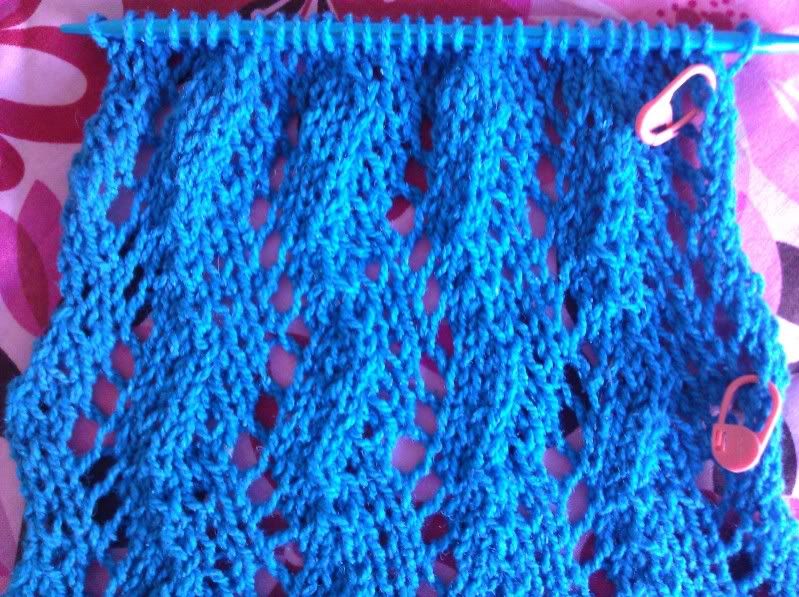
Project:
sev[en] circles by Kirsten Johnstone
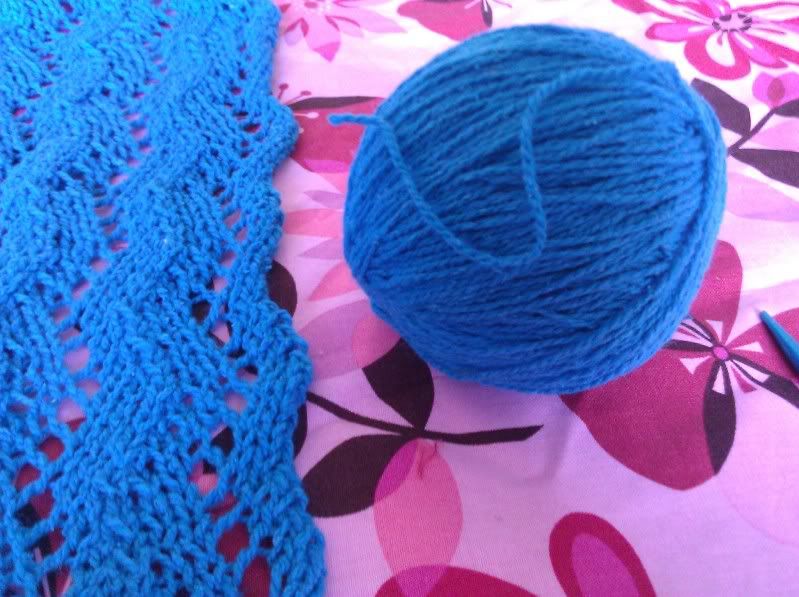
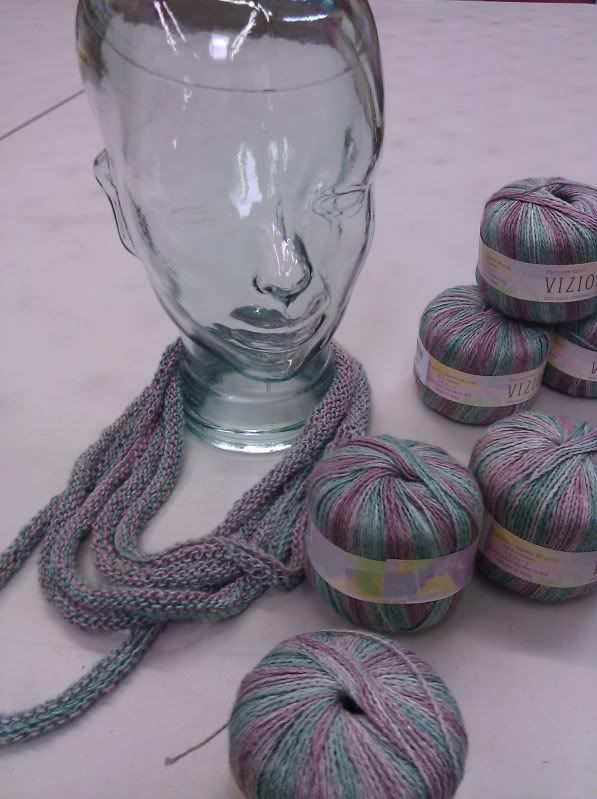
Yarn:
Plymouth Yarns Vizions (see options for yardage below)
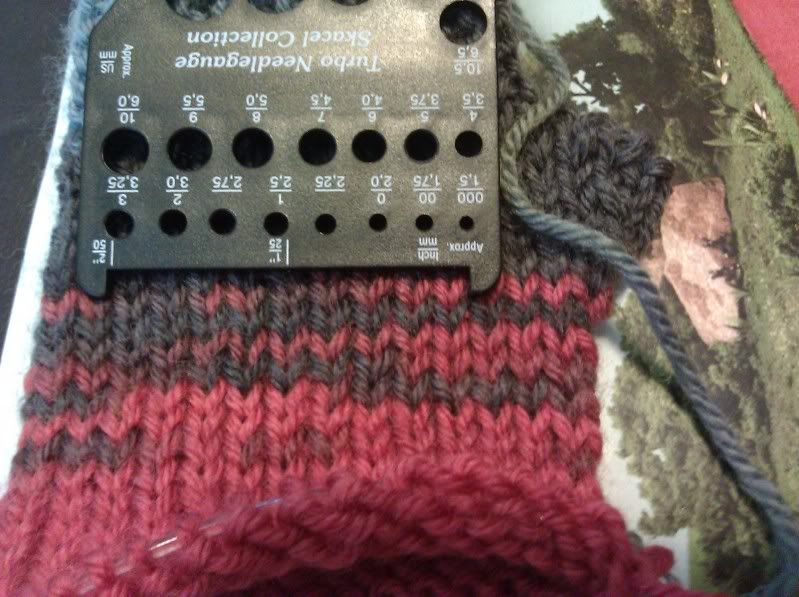
Needles: US 7/4.5mm
Knitting Plan:
Let's make this easy: you are going to follow one of two plans - a circle a day or devour it all in one night. With lots and lots of distractions slowing me down, each circle was taking me about 40 mins. So, it could be done in an evening if you start early enough.
Notes:
a)
MAJOR MODS: I got to five circles using 1 BALL and only working 5 ROUNDS per circle.
If you bought 2 BALLS, then you could do all 7 circles at 5 ROUNDS each. If you bought 3 BALLS, then you should be able to work the first circle option as written.
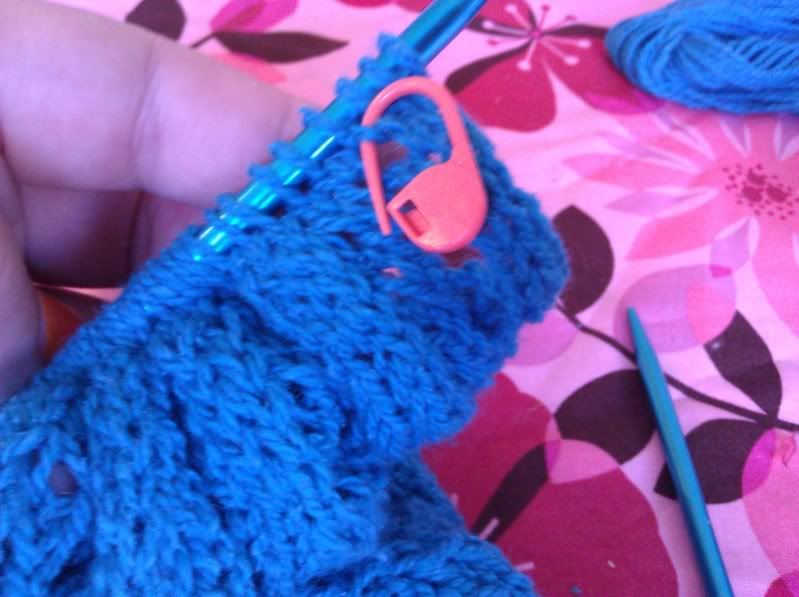
b) Join in the round simple by bringing your needles together and start knitting the first round.

c) As you complete your first circle, knit 10. Then, knit 2 more to begin bind off sequence.
d) There is no need to keep counting as you bind off. You just need to stop when 10 sts remain before the marker. That will look like one st on your right hand needle and 9 sts unworked on your left hand needle.
e) When casting on, place a marker every 10 sts to keep count. Never be marker proud. I like anything that saves steps and this saves counting over and over again. Remove these markers as you knit the first round of each circle.
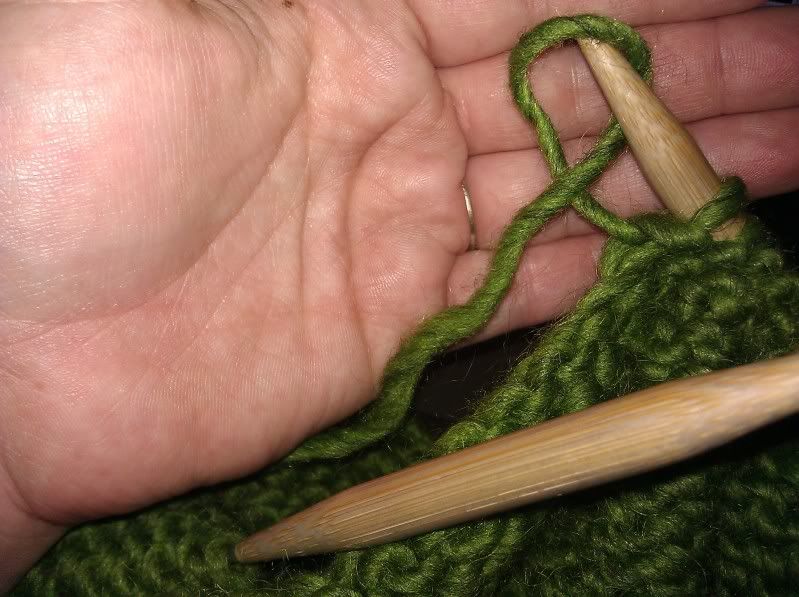
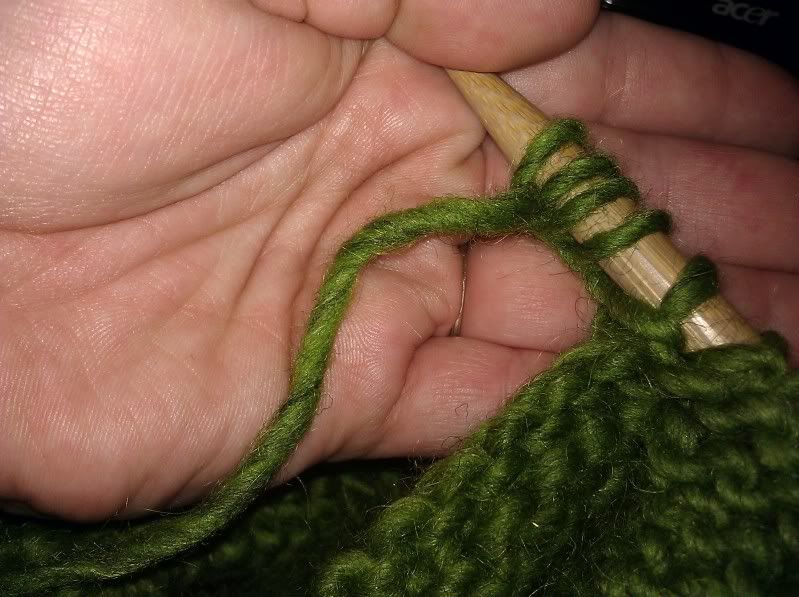
f) Backwards loop (or e-loop) Cast On VS. Cable Cast On.
Backwards loop Cast On is the technique suggested by the pattern. It is very easy to execute as you twist your yarn to look like a cursive E and then place that loop on your needle. The downfall is that it can look sloppy and can be hard to work into on the next row.

Cable Cast On is a little trickier but well worth the trouble. You turn your work to the purl side to begin and insert your needle in between the sts to draw up a new loop. I cast on the first circle with this CO (as per Terry's suggestion); then, I did the backward loop on the second circle. I chose to continue with the Cable CO on the rest as it was speedier to work into them.

g) I chose to weave my ends in along the CO and BO edges nearest the center spine. If you choose an option that uses more than one ball, then, I would recommend adding the new balls closest to the spine as possible. This choice should help to make woven in ends the least conspicuous.

If you are viewing this post far from driving distance from our store, then please remember that we will happily take phone orders. Here is a link to a color card to ease your color choosing process. Call us @ (805) 654-9500. (There will be a postage charge for shipping.) Also, I want to mention that we have refined the 10%off sale to apply when you are buying the yarn for the featured project.

P.S. If this idea really lights you up, then you can also join a ravelry group here.

Friday, July 22, 2011

Week 8 of 52: Isobel Scarf

I had a different project in mind for this week. It was to be the return of the big challenge project; I chose a very cute Knitty pattern, Rondeur by Mercedes Tarasovich-Clark. Sadly, even with my intense dedication to finishing, it is not a 7 day project. Despite its well written instructions, my little buzzing fingers couldn't get it to roll off the needles quickly enough.

In the eleventh hour, Ravelry.com led me to a great substitute project, Isobel by Jacquelynn Vance-Kuss. This pattern is a good fit to continue using the same yarn that I had for my top, Elsebeth Lavold Silky Wool. I cast on Tuesday evening and had my last end woven in by Thursday morning, remember that I was pressed to make up for lost time this week.

Week of July 22 to 28:
Yarn: Elsebeth Lavold Silky Tweed; 2 hanks (192 yds/50g)
Needles: US 8/5.0 mm; this needle size is not the suggested size from the pattern, but it is the size that gave me the desired look.
Knitting Plan:
I worked 30 repeats of rows 1-12. So, let's divide that work over a few nights.
Night 1: Setup rows and 7 repeats of main pattern
Night 2: 8 repeats of main pattern
Night 3: 8 repeats of main pattern
Night 4: 7 repeats of main pattern and remaining 4 rows.
Notes:
a) I don't usually use up yarn on fringe, but some times a project is really a right fit for that detail. To ensure that I can confidently knit until my yarn runs out, I usually cut the fringe first. On this project, I cut it before adding in the second ball. I like to use a DVD case as my standard fringe guide, as there is a short or along choice. I cut 40 pieces, wrapped along the long side, planning on putting 2 strands into each of the 10 and 10 eyelets on either end of the scarf.


b)This lace repeat is very addictive. To keep a speedy flow, I use locking ring markers to count my rows. I keep track of two sets at a time, placing the marker into the side of the sixth eyelet made in each set. I only need two markers; when I have finished the third set, I leap frog the lower marker up to the top to mark the newly completed set.

c) This stitch pattern calls for an SKP(slip one st., knit one, and pass slipped st over knit one). I find this decrease lacking elegance and prefer an SSK which you can learn about in Kaity's recent How-To. My true favorite is the single step SSK which is worked as follows: Insert your needle into the first st. knitwise and the second st. through the back loop. Knit these sts. as for a knit 2 together.

If you are viewing this post far from driving distance from our store, then please remember that we will happily take phone orders. Here is a link to a color card to ease your color choosing process. Call us @ (805) 654-9500. (There will be a postage charge for shipping.) Also, I want to mention that we have refined the 10%off sale to apply when you are buying the yarn for the featured project.

P.S. If this idea really lights you up, then you can also join a ravelry group here.


Monday, July 18, 2011

How-to Mondays- Single Crochet for Knitters

Enjoy! If you have any questions or comments, please comment below!!

Friday, July 15, 2011

Week 7 of 52: Bucket Hat

I am calling this the June Bride Bucket hat for two reasons: 1) I married these two great patterns together late last month and 2) I was a June bride (so according to Seven Brides for Seven Brothers, I am always a bride).

I made two, one in pink with a secret orange hem lining and one in turquoise with a secret denim blue lining. I began with the pink and the Shazzas Bucket Hat by Sharon of Shazzas Knits. It is a very cute pattern but the brim didn't have the body that I had imagined it would. So, I went on a hunt and borrowed the brim of A Better Bucket by Amy Swenson.

So, I have to run my family to Santa Barbara this morning to wrap up my husband's summer job. If you view this post on the morning of Friday, then here is the quick tip on making this project:
1) two hanks of Blue Sky Alpaca Cotton or Mirasol Hap'i; one of your main color(A) and one of your secret hem color (B).
2) work A Better Bucket in color B until you one row before purl turning row. Switch to A and work one knit row and then the purl turning row. Complete the brim by following A Better Bucket.
3) tune back in to find out how I married the body of Shazzas to this brim.

Wednesday, July 13, 2011

More Flounce!!!

We got a lot of a new fancy yarn a couple of weeks ago, maybe you were one of the lucky ones to get a ball!

Flounce is this fun new yarn that knits up into the most beautiful ruffled scarf. The yarn itself is a mesh ribbon that you knit through in a different kind of way! For a free pattern for this yarn and a video explaining how to knit with it, click here.

Well we quickly sold out of all the colors that we had, and we have a lot more on order! If you want a ball reserved for you, we can do that, Check out the colors and give us a call. This scarf was knit out of just 1 ball of Flounce on size 13 needles, with only 5 stitches per row! This might be the fastest scarf you'll ever knit!

Sunday, July 10, 2011

How-to Mondays- Decreases!

Hi everyone! Sorry for the lack of How-to Mondays in the last couple of weeks, I had jury duty and then I went to a Family Reunion over 4th of July, but I'm back and today we're going to learn about decreases, specifically SSKs vs. K2togs. These are the two most common decreases in knitting, and we're going to learn the difference between the two and a couple different ways to execute them. I hope you like it and learn something new!


This was a requested video! If you have something that you'd like me to film for and upcoming How-To Monday, leave a comment below! Thanks!

Saturday, July 9, 2011

Saturday Morning Daydreams


So, I am mesmerized with this delicious citrus color set of Madelinetosh Tosh Merino Light. Doesn't it scream summer day? A summer fruit salad of melons, orange? A squeeze of lemon or lime in your icy glass of water?

Friday, July 8, 2011

Week 6 of 52: The Kelly Bag


Knitting and fiber arts are at the center of my universe (you know, in the part that isn't occupied by home and family). So much centered and focused that sometimes I miss the cultural or fashion references that a knitted item might be making. This great felted bag imitates the classic Hermes style (since the 1930s) that Grace Kelly made her own in 1956. I think that it stands on its own without making that trip in the fashion way back machine.


This pattern is the ideal project to make the change from throwing to continental/picking. It has all the main features that I recommend - equal practice between knits and purls and felted(to hide any changes in gauge). According to a couple of sources, the Hermes bag can take 25 hours of labor by a skilled craftsman. I think that this project by my own (continental) hand was way faster.

This week is doubly as good as previous weeks as both Cascade 220 and Lamb's Pride Worsted are on sale for 10% off.

Week of July 8 thru 14:
Project:
The Kelly Bag by Jennifer Casa
Yarn: Pattern calls for Cascade 220, 2 hanks in main color and 1 hank in accent color. My samples are as follows: green - Lamb's Pride + Cascade; periwinkle - Lamb's Pride for both. So, you can translate that to also working with 2 +1 skein of Lamb's Pride.
Needles: US 9/5.5mm and US 13/9.0mm(US 11/8.0mm on periwinkle; she said that gauge didn't matter and she was pretty much right)
Knitting Plan:
Night 1 - Cast on and work hem; work body to the handle opening
Night 2 - Finish body
Night 3 - Work contrast/handle rows.
Night 4 - Sew up side seams and throw it in the washing machine for felting.
Night 5 (or when it is dry) - (Optional) Line it with a great fabric.
Notes:
a) I am really in love with these patterns that begin with a folded hem. In this pattern, she has you sew it up at the end but I chose to do it in the next right side row.


b)When you bind off for the handle opening, counting can get frustrating. A simple note on that is that you will know you are done binding off the center 12 you will know you are done when you have one loop on your right hand needle and 18 more on the left needle.


c)When you cast on back over that opening, I like to use the simple tool of a backward loop (or e-loop) cast on. You twist your yarn in toward the needle so that it looks like a cursive "e" and that the yarn will get trapped when you place the loop on your right hand needle.

d) When I went to the bigger needle, I slipped the first stitch on those rows to make my preferred method of seaming even easier. That method is a crochet slip st.


e) Washing Machine time: I place my bags into their own lingerie bags (saves cleaning fuzz off your drum and next few loads). Then, with a Shout Color Catcher (for loose dye), I ran them through my washer's shortest cycle twice. You will learn what is the best amount of time for your machine, but begin with the shortest cycle once. Some recommend not to let your felting go through the spin cycle because it can pull and distort your work. Knowing this warning, I still let it run through the whole deal.

f)Lining this bag is totally optional. I like to take advantage of any chance I get to add more fun color or texture to a project. When you have felted a project, it will turn out a little different every time. This said, use each bag as its own template.


If you are viewing this post far from drivingdistance from our store, then please remember that we will happily take phone orders. Here is are links to the Cascade 220 color card and to the Brown Sheep Lamb's Pride color card to ease your color choosing process. Call us @ (805) 654-9500. (There will be a postage charge for shipping.)

P.S. If this idea really lights you up, then you can also join a ravelry group here.


Wednesday, July 6, 2011

New from Skacel

We recently received from Skacel (You know Skacel, the people who make Addi Turbos!) a beautiful new pattern and yarn to match. The pattern is called the Giovannina Stole, and it was designed by Franklin Habit, you can read all about the design process and his inspiration here on his blog.

The yarn is equally lovely. Filisilk is a 70% Superfine Merino 30% Silk laceweight yarn, with over 600 yards to a skein! Come check it out today for this pattern or any other lovely little lacey something.

Friday, July 1, 2011

Week 5 of 52: Camp Out Fingerless Mitts


We have made it into July, our second month of this project push. I have been pretty pleased with how each project is turning out and that I am steadily checking off very fun projects that my needles have been itching to make. How 'bout you? Having fun yet?

When I listed this project as WIP (work in progress),
I named it "Wishful Campfire" because I wish that we could go camping more often. As for the campfire, we can fake that in the back yard with our fire pit and s'mores makings. However, upon learning that our own McGrath campground is slated for closure in September, I have a new urgency to grab our tent and at least attempt an overnighter.

Week of July 1 thru 7:
Project: Camp Out Fingerless Mitts by tante ehm
Yarn: Classic Elite Liberty Wool, 122 yd/50 g, 100% washable wool
Needles: US 7/4.5mm and US 9/5.5mm
Size Made: to fit a 7.5 inch palm (around, just below the base of my fingers)
Knitting Plan:
I double dog dare you not to stay up late and finish knitting the pair on the first night that you cast on. They are fast, addicting knits and very hard to put down once you begin. Here is a plan if you are one of those people who know how to savor a good thing.
Night 1 - First garter st band, pick up and begin body of mitt
Night 2 - Finish first mitt. Begin the process again with knitting of the second garter st band.
Night 3 - Finish second mitt
Notes:
a) The pattern begins with a crochet provisional cast on. A provisional CO is meant to give you live sts at both ends of your work. For this pattern, it allows you to join this starting strip of garter st into a continuous tube to form most of the palm portion. You begin with a crocheted chain and pick up the desired # of st in the back of the chain. Later, it should pull open like opening a bag of pet food. I have always had trouble making that happen. I found that placing a locking ring marker in the last chain to preserve that final loop for the great opening.


b) The pattern has you graft (or work kitchener) the two ends of the garter st band together. I decided to use a 3 needle bind off instead. It is fast and it saved me some ends to weave in. The last loop left at the end of bind off counts as your first pick up st.

c)SWATCHING! Making a swatch (practice piece) is the key to success when you want something to fit. Sometimes you get lucky - you can cast on and treat the beginning of the actual project as the swatch. Here is the story of my gauge journey: cast on with US 7 and got the desired 4.5 sts/in for garter stitch; then, I started working the body of the mitt in Stockinette St.; it took three needle changes (and froggings) to arrive at US 9 for the mitt body.


d) Even with achieving the correct gauge/needle combination, the mitt as the pattern is written only measures about 6.5 inches around. I made the following changes to fit a larger palm.
Work 64 rows instead of 54 for the garter stitch band. Pick up 34 sts instead of 29 sts. Followed the same length as pattern when working the body, but stopped at 9 inches and worked last 3 rows as purl round, knit round, and purl round.

e) You may begin to loose the faith that this little ball of yarn will make a full set. To reassure you, weigh your ball of yarn before cutting the cord on the first mitt. The remains of my yarn ball weighed 28 g before I bound off. Since it was a 50g ball when I began, I could confidently proceed.

f) Beware. This pattern is a very satisfying knit and this yarn is crazy fun (to see how it will turn out). You should simply lean into its addictive nature and choose at least two or three differnet balls when you come in to buy your yarn.
If you are viewing this post far from driving distance from our store, then please remember that we will happily take phone orders. Here is a link to a color card to ease your color choosing process. Call us @ (805) 654-9500. (There will be a postage charge for shipping.)
P.S. If this idea really lights you up, then you can also join a ravelry group here.