
Monday, August 29, 2011
Friday, August 26, 2011
Week 13 of 52: Wavy [Malabrigo] Scarf
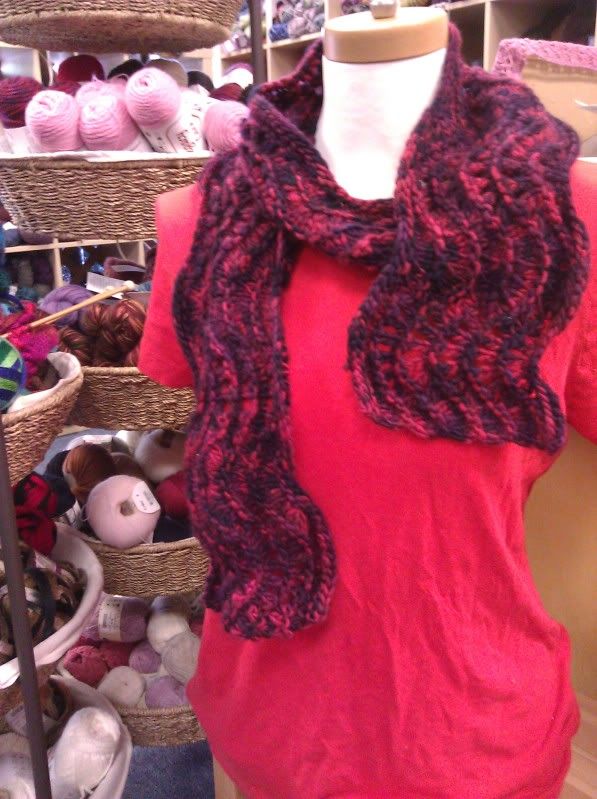
My school age child has returned to school and I am craving the oncoming fall. Two things fulfill this craving, scarves and pumpkin flavored things.I have always been a fan of a scarf that is cast on long ways. I have been known to state that I can easily see doing a finite number of very long rows rather than a seemingly infinite number of shorter rows. This scarf was completed in 24 rows and lived up to every bit of fun that the classic feather and fan pattern offers!
Week of August 26 through September 2
Yarn: Malabrigo Worsted, 1 hank of 210yds/100g
Needles: US 11/8.0mm; the pattern calls for US13/9.0mm, but I knit on the loose side.
Knitting Plan:
Night 1 - CO and work 2 repeats of the pattern st.
Night 2 - Work 2 repeats of the pattern st.
Night 3 - Work 2 repeats of the pattern st and BO.
Notes:
a) As my yarn has a little less yardage than the pattern called for, I was planning to cast on 180 sts rather than 216. I then changed the plan and decided to cast on the 216 sts called for in the pattern and do less pattern repeats. I think that I will have more control over the yardage with this new plan.
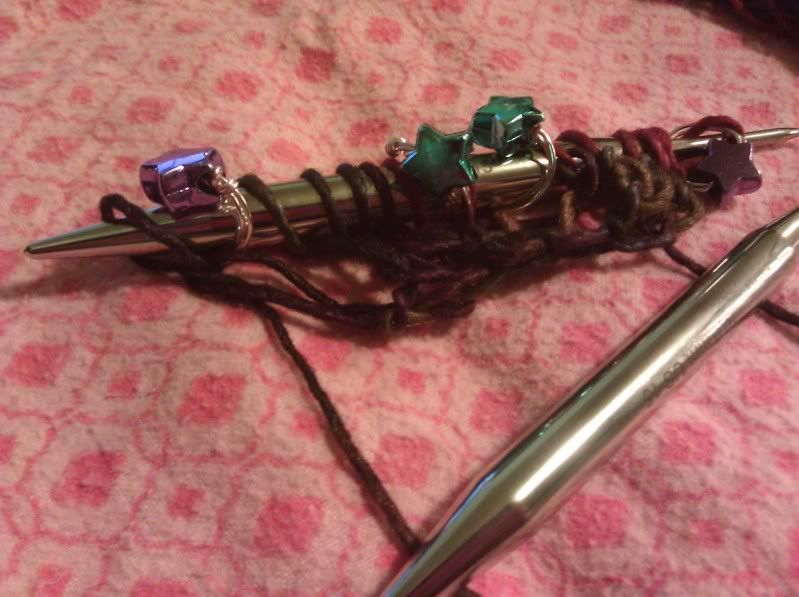
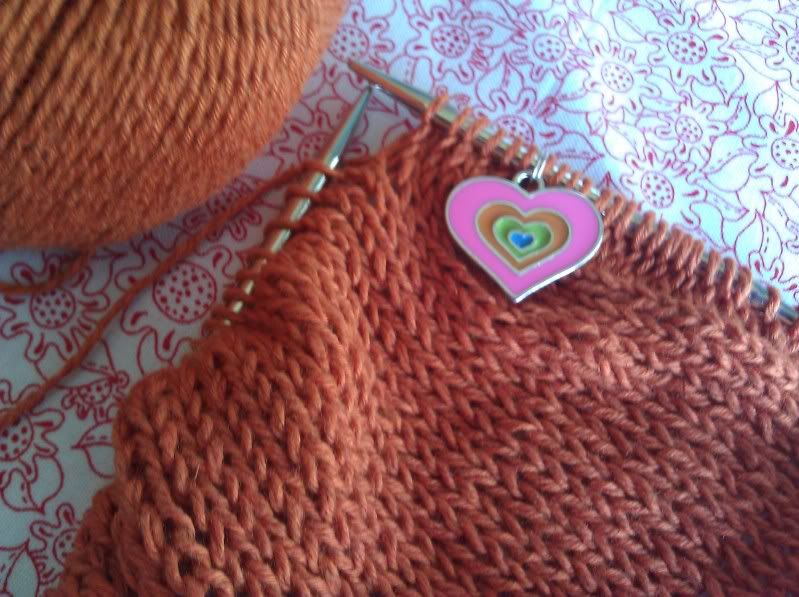
b) I placed my markers as I cast on. Markers are sanity helpers and make for a successful count the first time.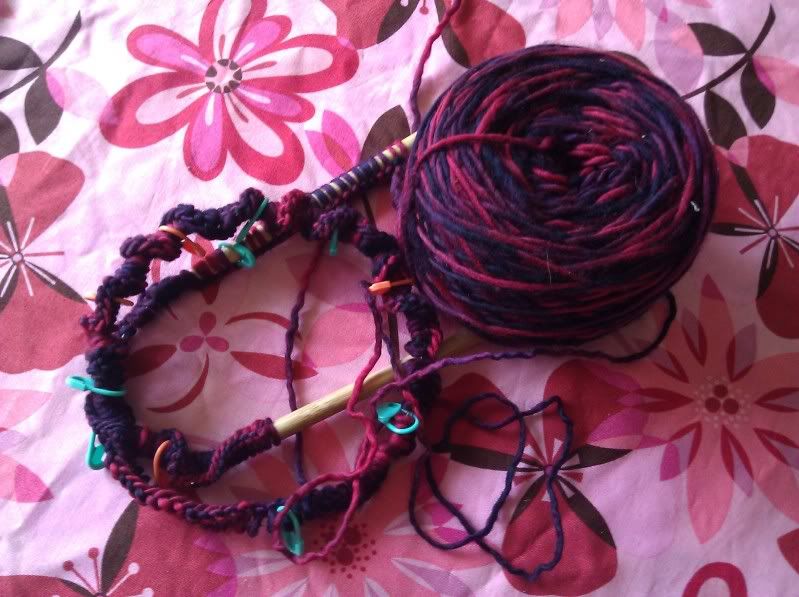
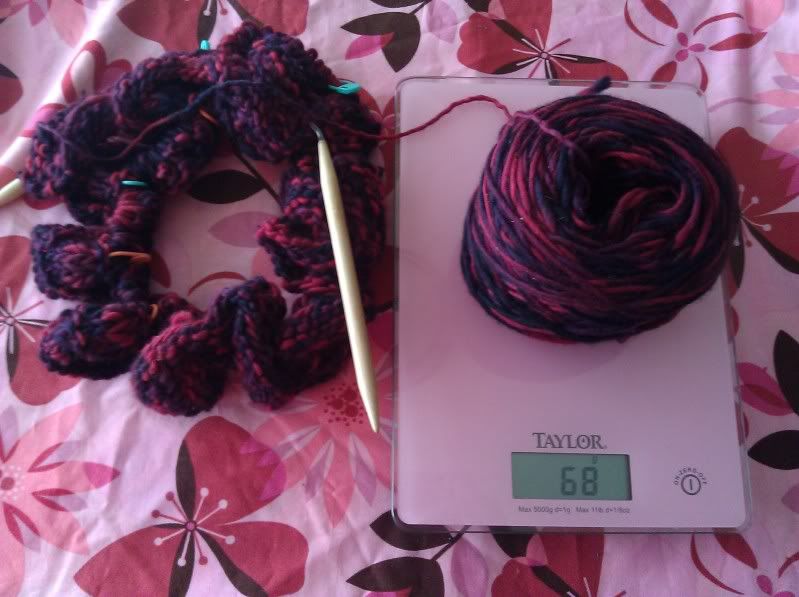
c) In an effort to know how many rows I can get out of my 210yds/100g, I will measure the ball at the beginning of a row repeat, 82g and, then again at the end of the fourth row, 68g. I can then figure out how much I can get out of the remaining weight. With each repeat taking 14g, I can easily complete 4 more repeats and the bind off row for a total of 6 pattern repeats instead of the 8 that the pattern calls for. This scarf is still going to be plenty wide.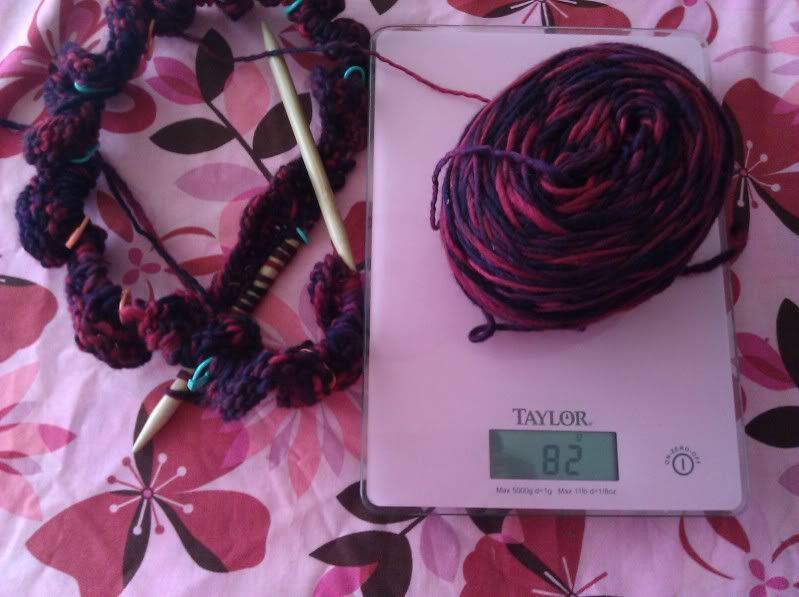
d)Be sure to bind off very loosely so that the wavy edge has a chance to bloom and roll along. You could bring in a larger needle just to be on the safe side.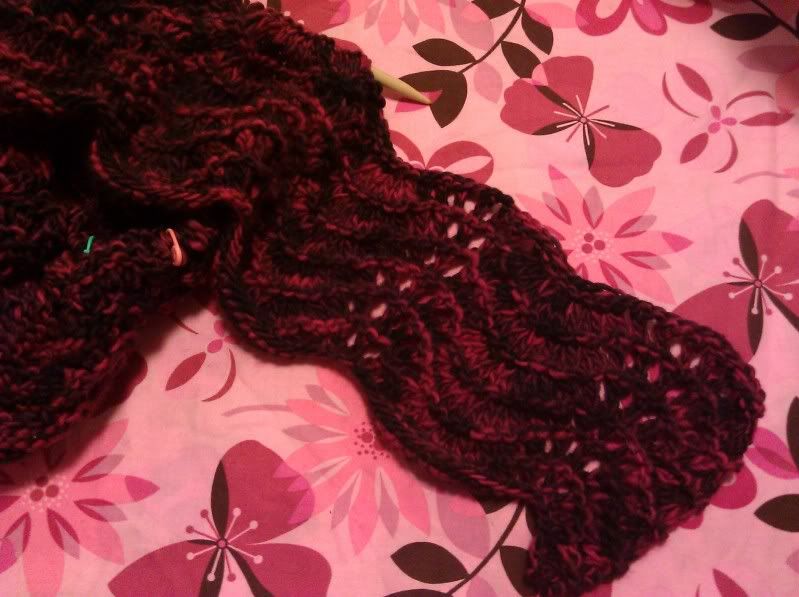 e)I resorted to my very favorite and most lazy way of blocking, steam. Be sure that you do not let your iron touch the knitting as it will smash and distort your stitches rather than open them up; simply hover above each section as you hit the steam button. I do a section that fits on the board, hit it with steam, stretch and shape, let it cool, and move to the next section.
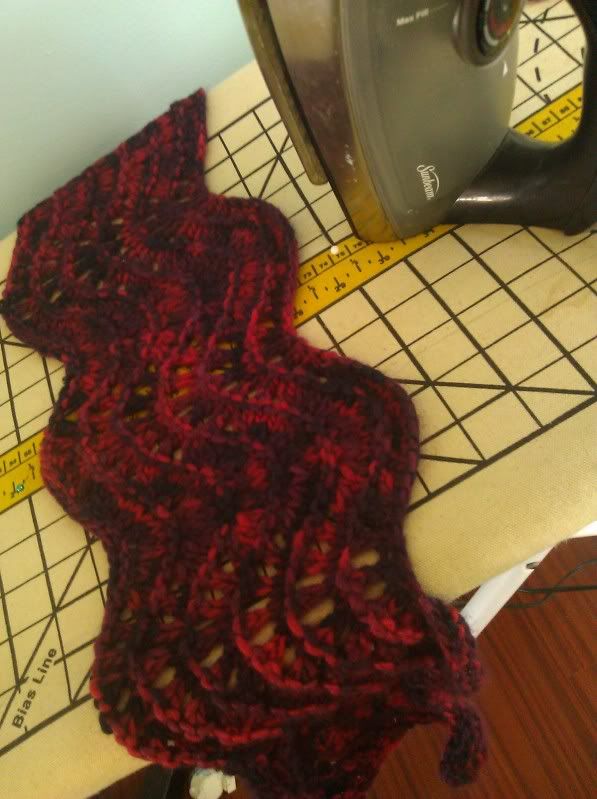 If you are viewing this post far from driving distance from our store, then please remember that we will happily take phone orders. Here are color cards: multis and solids. Call us @ (805) 654-9500. (There will be a postage charge for shipping.) Also, I want to mention that we have refined the 10%off sale to apply when you are buying the yarn for the featured project.
c) In an effort to know how many rows I can get out of my 210yds/100g, I will measure the ball at the beginning of a row repeat, 82g and, then again at the end of the fourth row, 68g. I can then figure out how much I can get out of the remaining weight. With each repeat taking 14g, I can easily complete 4 more repeats and the bind off row for a total of 6 pattern repeats instead of the 8 that the pattern calls for. This scarf is still going to be plenty wide.
d)Be sure to bind off very loosely so that the wavy edge has a chance to bloom and roll along. You could bring in a larger needle just to be on the safe side.
e)I resorted to my very favorite and most lazy way of blocking, steam. Be sure that you do not let your iron touch the knitting as it will smash and distort your stitches rather than open them up; simply hover above each section as you hit the steam button. I do a section that fits on the board, hit it with steam, stretch and shape, let it cool, and move to the next section.If you are viewing this post far from driving distance from our store, then please remember that we will happily take phone orders. Here are color cards: multis and solids. Call us @ (805) 654-9500. (There will be a postage charge for shipping.) Also, I want to mention that we have refined the 10%off sale to apply when you are buying the yarn for the featured project.P.S. If this idea really lights you up, then you can also join a ravelry group here.
Thursday, August 25, 2011
More Madelinetosh!
I'm in love with Madelinetosh. They make the most gorgeous yarns in the most heavenly colors, and excellent patterns to back it up! Today I got to open up a big box from them, and when I cut it open, it felt like Christmas Morning! I wanted every color I pulled out, but I limited myself to just one!
and their Sport weight:
I bought one skein of Chunky in "Dutchess", a really dark blackish purple for a class sample (Stay Tuned for our schedule, it should be here soon)! Come check them out, you won't be dissapointed!
We got their new Chunky weight:
 |
| From Anacapa Knits |
and their Sport weight:
 |
| From Anacapa Knits |
I bought one skein of Chunky in "Dutchess", a really dark blackish purple for a class sample (Stay Tuned for our schedule, it should be here soon)! Come check them out, you won't be dissapointed!
-Kaity :)
Monday, August 22, 2011
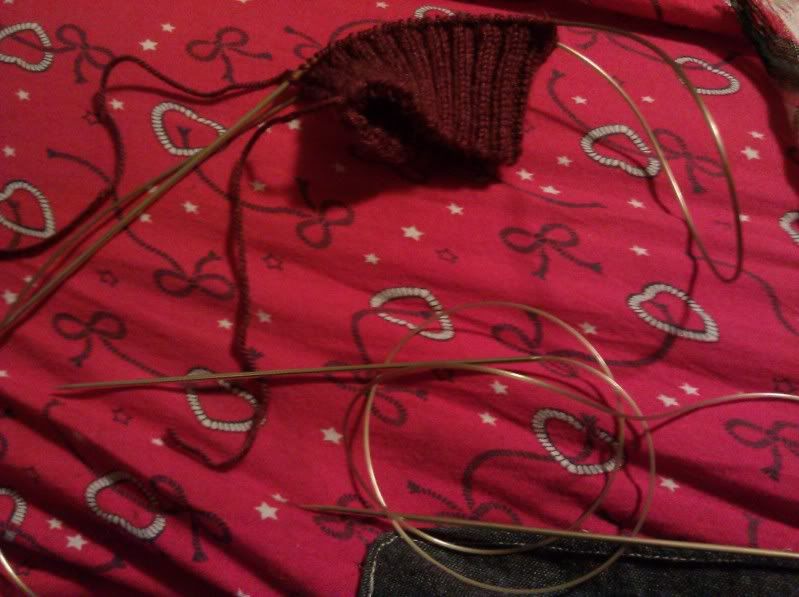
How-to Mondays- How to Knit in the Round
Today we're gonna learn about knitting in the round using Double Pointed Needles, 2 Circular Needles, and the Magic Loop Method.
I Hope you enjoy!
I Hope you enjoy!
Friday, August 19, 2011
Week 12 of 52: Clara Parkes' One Skein Shawl
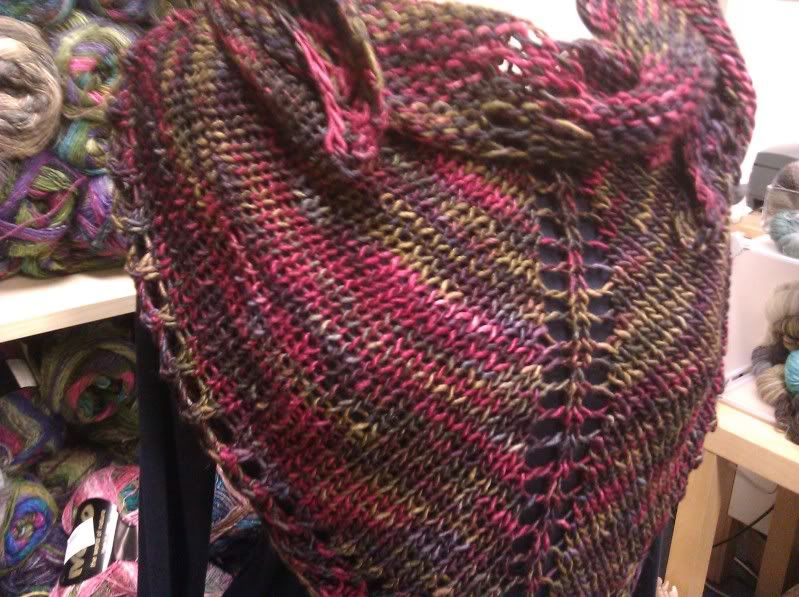
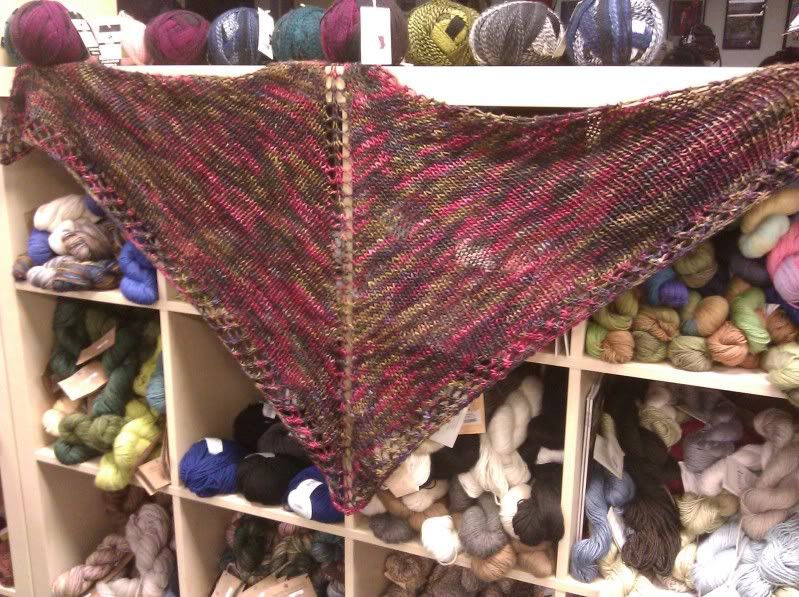
To begin, I would like to actually call this a One hundred Gram shawl rather than a One Skein Shawl, as I am using two hanks of Manos del Uraguay Silk Blend. This shawl is a great recipe for a delicious indulgence in a fun yarn, either for color or content or both. I think that I might be making one up whenever we get new colors of Manos; I always daydream about the luxury of a whole cuddly sweater in this yarn, and now I have a go to project to lightly indulge that cuddling daydream.
Yarn: Manos del Uraguay Silk Blend, 2 hanks of 150yds/50g
Needles: US 15/10.0mm
Knitting Plan:
Let's make this project a three night tour.
Night 1 - CO and watch your shawl grow so very swiftly. Work on it until you are sleepy.
Night 2 - Continue as established, getting through the rest of the first ball and then at least a few rows of the second ball. As your shawl is still growing very fast, be sure to put yourself to bed at a decent hour.
Night 3 - Finish the second ball, work the last 6 rows in the simple lace, and BO.
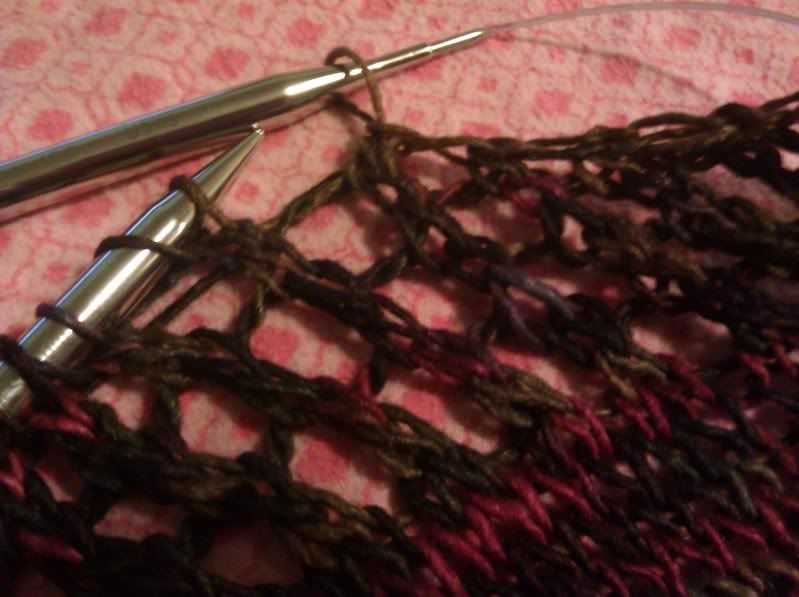
 b)This project is a great one for interchangeable needles, as you can start on a shorter cable and then lengthen it as your shawl grows.
 d) This yarn is a perfect candidate for a spit splice, helping you to diminish the number of ends that you have to weave in at the end.
e)As I had more yardage than the shawl worked in the pattern, I was able to increase to 75 body sts each side (153 sts total).
f)The bind off described in the pattern, the Flexible bind off, is a really nice BO. I wanted to jazz it up so I followed a yarn over bind off that I memorized from helping many people finish off their Peace Shawls. It mimics the simple lace that we established in the border. (At least, I think that I remember it to be as follows.) This bind off is the only part of this project that you need to work in a quiet place. For this shawl, work as follows: K1, YO, BO K1 over the YO, *K2tog, BO, YO, BO, repeat from * until one st before the center st., **K1, BO, YO, BO, repeat from ** 2 more times, ***SSK, BO, YO, BO, repeat from*** until last st., K1 and BO last st. Cut a tail and pass it through the last loop.
P.S. If this idea really lights you up, then you can also join a ravelry group here.
Week of August 19 through 25
Project: One Skein Shawl by Clara Parkes
Yarn: Manos del Uraguay Silk Blend, 2 hanks of 150yds/50g
Needles: US 15/10.0mm
Knitting Plan:
Let's make this project a three night tour.
Night 1 - CO and watch your shawl grow so very swiftly. Work on it until you are sleepy.
Night 2 - Continue as established, getting through the rest of the first ball and then at least a few rows of the second ball. As your shawl is still growing very fast, be sure to put yourself to bed at a decent hour.
Night 3 - Finish the second ball, work the last 6 rows in the simple lace, and BO.
Notes:
a)With its 5 sts, the first row of this shawl establishes 5 sections: an edge st., a body section, the center st., a body section, and an edge st. Place markers on either side of the center st at the very least; you may also want to place markers after each edge st. Though this pattern is a very straight forward process, markers will help you remember where to increase as you barrel swiftly through a knit row. (Never be marker proud.)
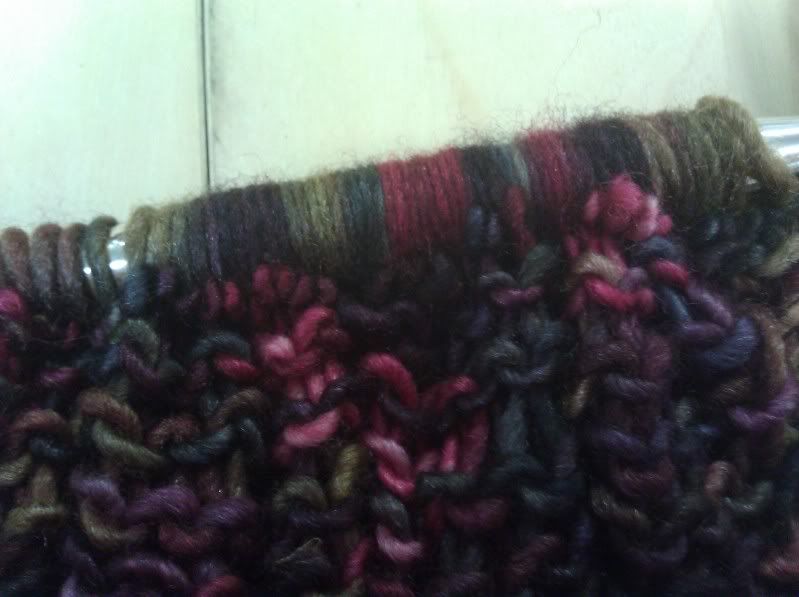
c) This thought has little to do with the execution of this shawl: I love seeing all the beautiful colors of the yarn formed into sts that are all lined up and squished up on the needle.
d) This yarn is a perfect candidate for a spit splice, helping you to diminish the number of ends that you have to weave in at the end.
e)As I had more yardage than the shawl worked in the pattern, I was able to increase to 75 body sts each side (153 sts total).
f)The bind off described in the pattern, the Flexible bind off, is a really nice BO. I wanted to jazz it up so I followed a yarn over bind off that I memorized from helping many people finish off their Peace Shawls. It mimics the simple lace that we established in the border. (At least, I think that I remember it to be as follows.) This bind off is the only part of this project that you need to work in a quiet place. For this shawl, work as follows: K1, YO, BO K1 over the YO, *K2tog, BO, YO, BO, repeat from * until one st before the center st., **K1, BO, YO, BO, repeat from ** 2 more times, ***SSK, BO, YO, BO, repeat from*** until last st., K1 and BO last st. Cut a tail and pass it through the last loop.
g)On blocking, I just steam blocked the lace edges, meaning that I laid it across my ironing board and gave it shot of steam from my iron. (Don't let the iron touch your work, just let it hover above.)
If you are viewing this post far from driving distance from our store, then please remember that we will happily take phone orders. Here is a link to a color card to ease your color choosing process and here is another. Call us @ (805) 654-9500. (There will be a postage charge for shipping.) Also, I want to mention that we have refined the 10%off sale to apply when you are buying the yarn for the featured project.
P.S. If this idea really lights you up, then you can also join a ravelry group here.
Thursday, August 18, 2011
Something new to do with Triana...

Many of us have been having a lot of fun making scarves with the new Flounce and Triana yarns by Katia. I especially like the meshiness (new word) of Triana, and thought that a scarf didn't really show it off. I turned it on its side, and started working it into a spiral. It was so fun, I couldn't stop. I created the Kelp Forest Shawlette- This circular shawl spirals out like a nautilus, and creates a really lovely ruffled edge; while showing off the lacy netting of the yarn - It's an easy freebie; I hope that you like it.
Kelp Forest Shawlette
download now

Materials:
2 balls Triana by Katia (33yds/100g), US11 (8mm) needles, sewing needle and matching thread.

Begin Pattern:
Prep row: Spread out the end of the tape. The tape will have one end that is thin, and one end that is a bit wider. Hold it so that the “thin” end is to the right.
Insert the tip of your right needle in each hole in the mesh of the tape from right to left (4 sts picked up). Then, spread the wider section open, and insert right tip into one of the smaller holes (5 sts on right needle).
Turn work so that this needle is now in your left hand, inserting other needle into all sts knit wise. Pick up the next hole on the thin side with your fingers, loop it onto the needle, and pull it through all the sts. Turn, and place needle back into right hand.


Basically you will knit a st, and bind off a st. - over and over in a spiral until all loops have been used up. Here's how -
Spread the wider side of the tape open with your left hand, insert tip of right needle approximately ½ in. (1.5 cm) from the st. on the needle (this doesn't have to be exact). Pick up the next loop from the thin side, and make a knit st. Bind off previous st. keep spreading out the tape as you need for each hole. Repeat until all loops on first ball are knitted, and one st. remains on right needle.
Spread out the end of the tape on the next ball. Pick up the first hole on the thin side and continue to knit it through the wider end, continuing approximately ½ in. (1.5 cm) from last st knitted.
Use sewing needle and matching thread to sew loops and last st to spiral, approximately ½ in. (1.5 cm) from final st. Voila! Fini!

Friday, August 12, 2011
Week 11 of 52: Ilene Bag

Woohoo! We are 20% through to the goal.
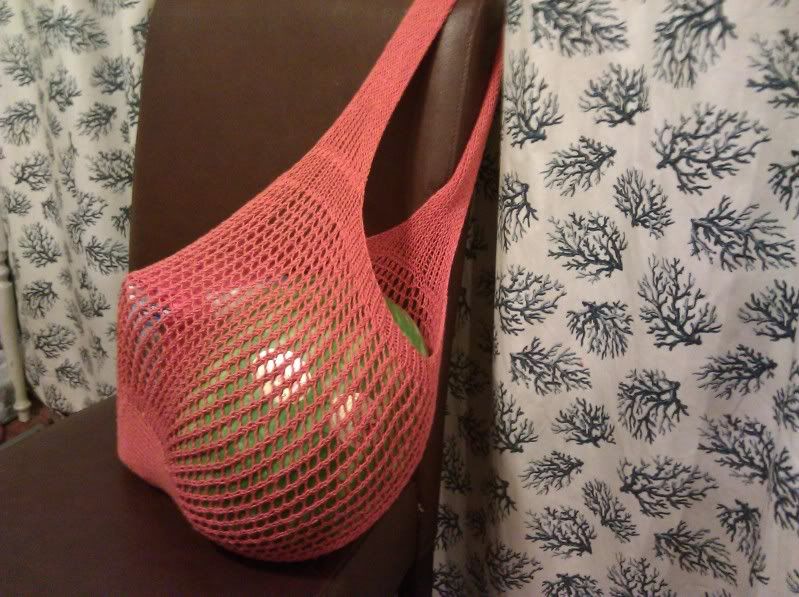
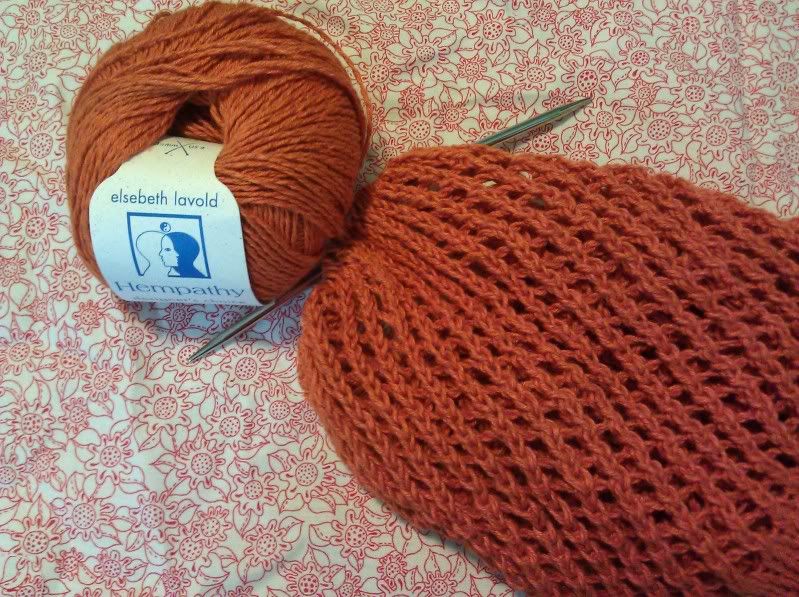
As the summer merrily rolls along, there are so many opportunities for a reusable shopping bag - the many farmer's markets from here to Santa Barbara throughout the week, the fair that wraps up this weekend, your regular grocery trip, etc. I had a lot of fun making this bag, but it is unlikely to be fated to replacing a plastic bag and is more likely to be put into service as a project bag. Boy, can it stretch (to fit lots of produce or a sweater's parts).
I chose this bag pattern out of the many similar styles because I decided that its construction is very smart and easily executed. If you already find yourself among the 1177 Ravelers who have made this one, then there are a couple of others that have different approaches to the bag bottom that are interesting and challenging - the Let's Go Shopping Bag and the Pi Bottom Market Bag. With my leftovers and a third ball, I am thinking about making these produce bags to go along - Reusable Produce Bag or Sexy Reusable Vegetable Lingerie.
P.S. That is a bag of flour and a watermelon in the picture above.
Week of Aug. 12 through 18
Project: Ilene Bag by Hannah Ingalls
Yarn: Elsebeth Lavold Hempathy
Needles: US 6/4mm and US4/3.5mm; I used 16" circulars but you could also probably get away with 24".
Knitting Plan: This bag is really a swift knit.
Night 1 - Make the base and pick up sts around the perimeter.
Night 2 - Work 26 rounds in lace pattern.
Night 3 - Work 24 rounds in lace pattern.
Night 4 - Work through ribbing and handle.
Notes:
a) I chose to work 28 rows for the base so as to make sure that it was easy to find 28 spots for the 28 sts that are picked up along the short sides.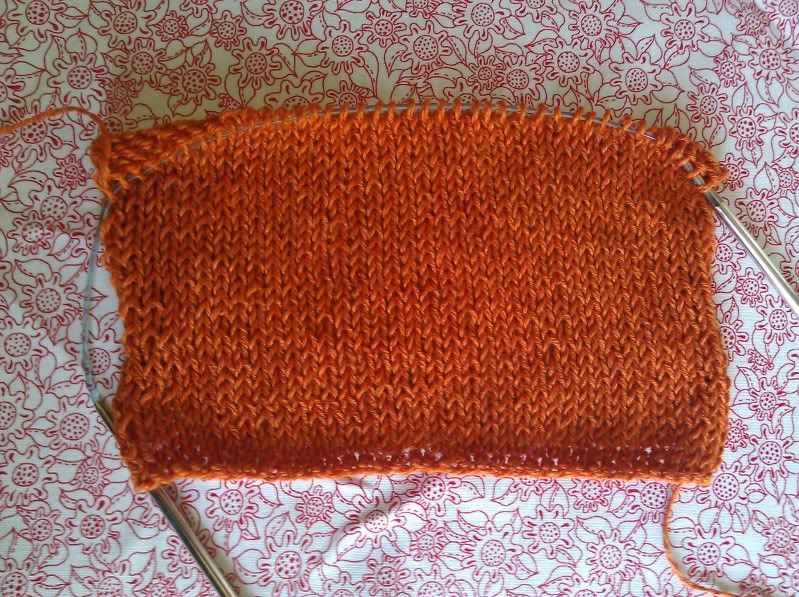
b) As I picked up sts., I placed a marker as I began each side to help keep count with a unique marker to mark the beginning of the round. I left them in as I worked around just for kicks. Never be marker proud, they are the key to sanity.

b) As I picked up sts., I placed a marker as I began each side to help keep count with a unique marker to mark the beginning of the round. I left them in as I worked around just for kicks. Never be marker proud, they are the key to sanity.
c) One ball of Hempathy got me through to the 40th row of lace. Try to add your ball on the knit row of the repeat as it will be much easier to control in a row that you are not making yarn overs.
d) This designer wrote a great straight forward pattern; among the straight forward directions, she points out that many online tutorials already exist for the 3 needle bind off. I would like to direct you to my favorite.
P.S. If this idea really lights you up, then you can also join a ravelry group here.
Friday, August 5, 2011
Week 10 of 52: LLP Fingerless Mitts
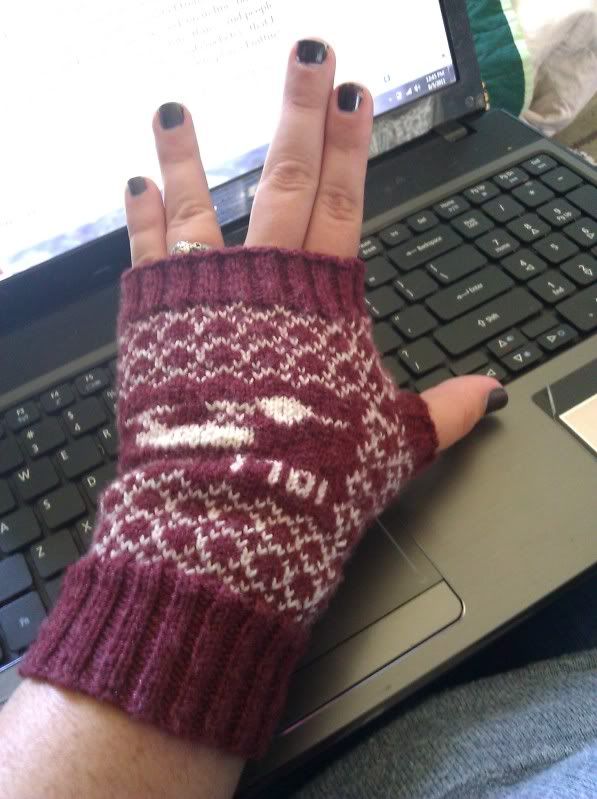

You may have heard that my family (Kevin, Bella, and I) adventured to Comic Con in San Diego two weeks ago. Last July, I was watching the news stories about the 2010 event wishing that I could go and we set the goal of attending this year's. It was worth ever bit of trouble and we can't wait to go next year. I had brought these mitts, the LLP mitts, along to work on in line, but found that I needed to work on my simpler project as there were many shiny things and people to distract me. The best part of the whole weekend was all of the knitters and crocheters that I met in line and was able to friend immediately on Ravelry. Next year, I want to plan a knitting meet up while we are down there (so, if you are going too, join this group).
Can you guess what LLP stands for? Reach into your Star Trek knowledge. Kevin's first guess was wrong but awesome - "Lady's Love Picard." Please respond with your answers in the comment section.
b) As you float your colors behind your work, remember not to pull them too tight or drag them too loosely - keep them draped like a Mona Lisa Smile.
c) As you work through the Enterprise Chart, there will be spots with more than five of the same color in a row. This distance causes too long of float. You should catch the color that you are not working in by inserting your needle as to knit, draping the unused color over the X from right to left, and then working the next st normally.
Week of Aug. 5 through Aug. 11
Project: LLP Fingerless Mitts by Audrey Paquin
Yarn: Regia Silk 4-ply; 1 ball each of two colors; If you reverse the colors, then you should have enough to make two pairs
Needles: US 00/mm and US o/mm; the pattern calls for US 2/mm, but I needed to go way down to get her gauge of 12sts/in.
Knitting Plan: So, you may already be saying no way to this project on account of its tiny needles, but, please don't let stop you. Allow me to put the number of sts. into perspective: you cast on 80 sts, the equivalent of many worsted weight hats. Therefore, each mitt is about the work of a hat. You could make two hats in a week, right?
Night 1 - Work cuff and first 15 rows of the mitt body.
Night 2 - Finish the mitt body.
Night 3 - Work final 12 rows of ribbing and the thumb.
Repeat nights 1 - 3 for mitt 2.
Notes:
a) This pattern is another that can serve as its own swatch as long as you are ok with ripping out if the first needle combo doesn't work. I began with a US 1 for the ribbing and a US 2 for the body. With my tendency to be loose, this swatch mitt was big enough to fit at least 1.5 hands. So, I bought the smallest needles I have ever owned and success was eminent. When you finish the ribbing, she instructs that you work 1 row knitting; I used this row to switch to the larger needles (haha, calling US 0 larger).
b) As you float your colors behind your work, remember not to pull them too tight or drag them too loosely - keep them draped like a Mona Lisa Smile.
c) As you work through the Enterprise Chart, there will be spots with more than five of the same color in a row. This distance causes too long of float. You should catch the color that you are not working in by inserting your needle as to knit, draping the unused color over the X from right to left, and then working the next st normally.
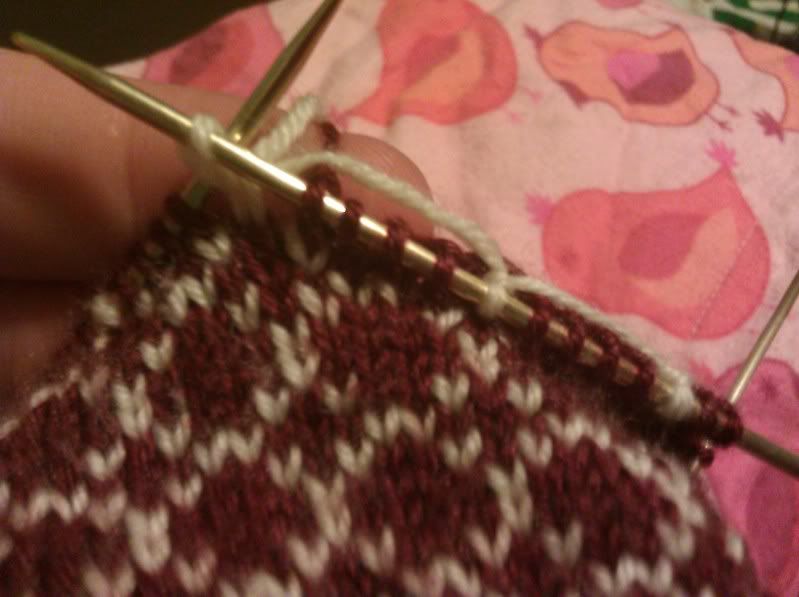
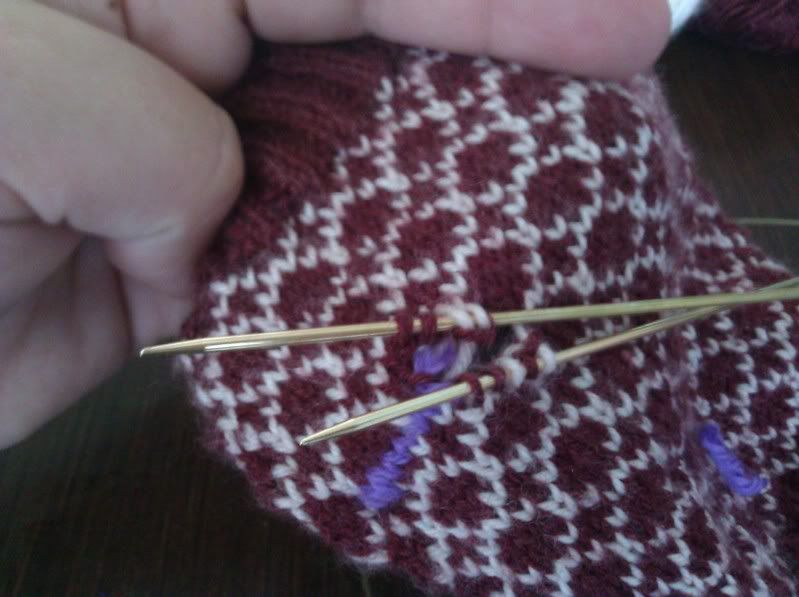
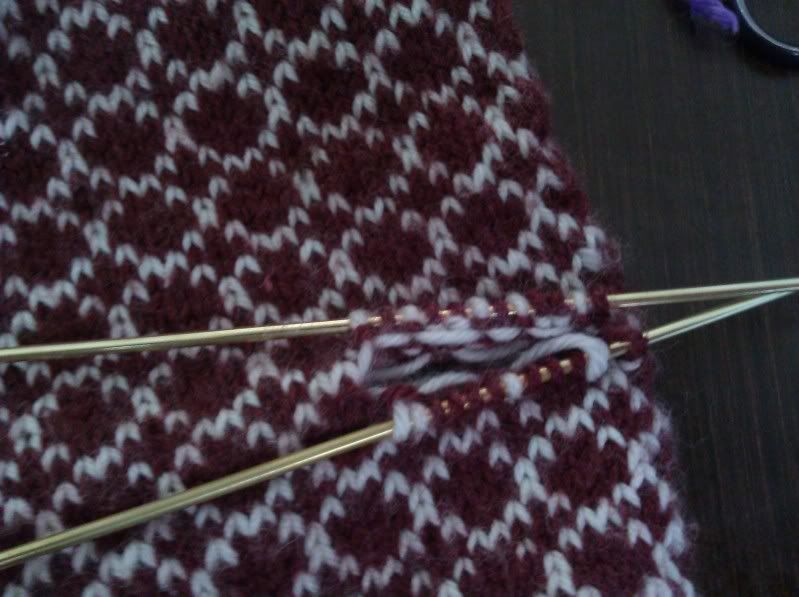
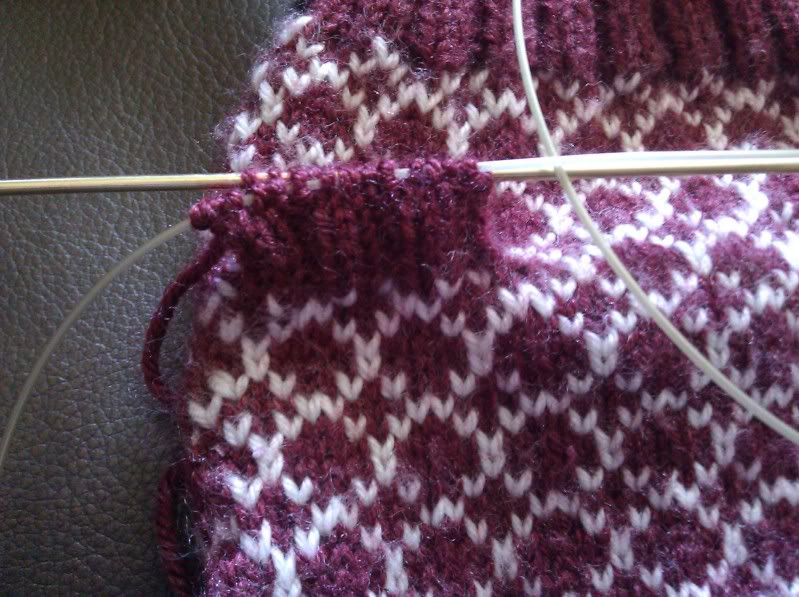
d) Follow her instructions in "Step 4" for the afterthought thumb exactly as she writes them. Below I have some pics of the process. The only change I made was doing the thumbs two rounds later than her placement and not for any very good reason.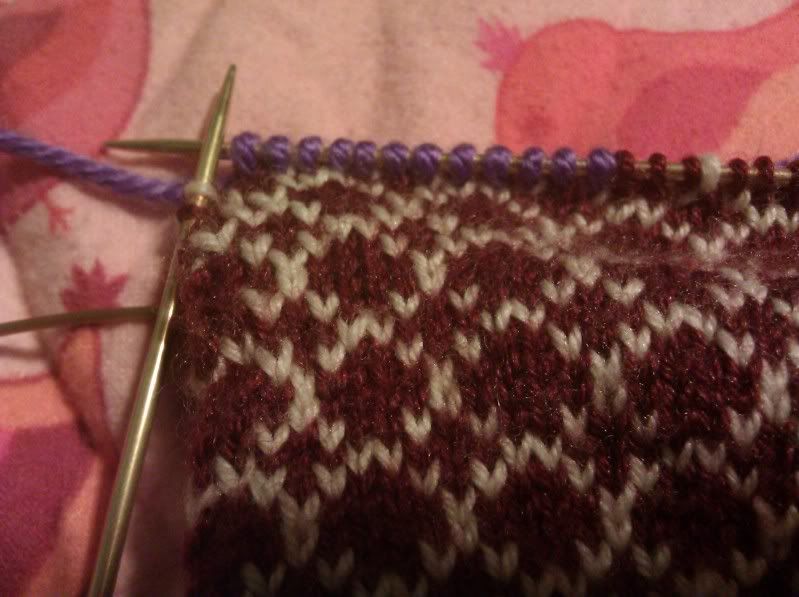
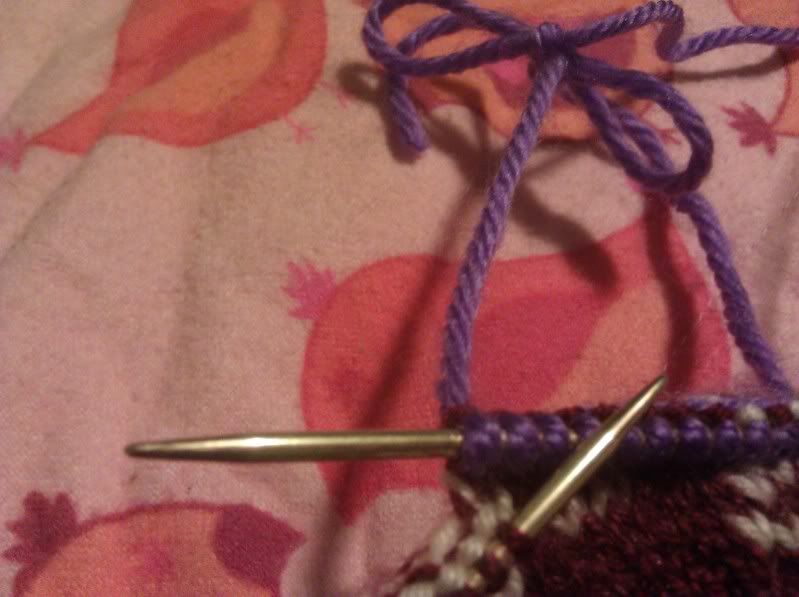
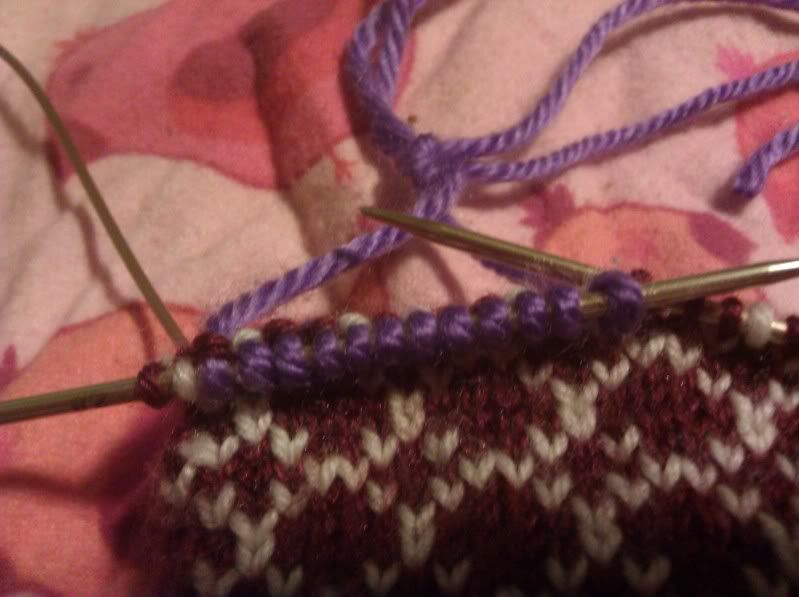
e) When you open that thumb later, be careful but confident with your surgery. The sts will not disappear on you but you still need to be swift about wrangling them. The top half is always the tricky bit, often seeming to be a st short. For this situation, I practice "fake it till you make it."
f) I worked 6 rounds of ribbing for my thumb.

g) For binding off both the top of the mitt and the top of the thumb, I used the last rows of ribbing on each to set up this stretchy BO:
"Super Stretchy
Uses: Perfect for edges needing lots of stretch like necklines, cuffs of toe up socks, bands of top down hats
-For 1X1 ribbing, on the row before the bind off row: K1, M1 (make one with an E-loop and not by lifting the in between thread), pull the M1 tight, P1. Repeat around.
-Bind off row (go up a needle size or two to really ensure stretch): K1, sl the M1, pass the K1 over the slipped M1, P1, pass the slipped M1 over the P1, K1 pass the P1 over the K1, etc.
-For 2X2 ribbing, on the row before the bind off row: K2, M1, P2, M1. Repeat around.
-Bind off as above, remember to slip the M1 rather than knitting it. The M1 is never worked so it doesn’t change your st count, it just adds yarn in to add elasticity.
Notes: Can be used for other ribbing combos; just remember to make one via an E-loop between the knits and purls." (This segment is an excerpt from my CO/BO class, coming again this fall.)
If you are viewing this post far from driving distance from our store, then please remember that we will happily take phone orders. Here is a link to a color card to ease your color choosing process. Call us @ (805) 654-9500. (There will be a postage charge for shipping.) Also, I want to mention that we have refined the 10%off sale to apply when you are buying the yarn for the featured project.
P.S. If this idea really lights you up, then you can also join a ravelry group here.
Wednesday, August 3, 2011
madelinetosh!!!
We've been waiting and waiting, and it's here! We got a huge box from madelinetosh yesterday (and I got to open it! It felt like Christmas!) stuffed to the top with gorgeous colors. It was such a joy to keep pulling different colorways out of the box, and saying "Oooh! I want this one!!"
We recieved more Merino Light, one of my favorites! It's 420 yards of lovely single ply Merino wool fingering weight goodness! I knit this shawl out of one skein of Merino Light in "Chamomile":

Here's a couple of my favorite colors that we just received:
Besides shawls, Merino Light makes great accessories! Check out the Staghorn Mitts.
We also got more Pashmina, madelinetosh's wool, silk, and cashmere sport weight yarn:
And last but not least is one we've never had: Prairie!
Prairie is over 800 yards(!) of laceweight, plenty for a beautiful giant shawl! Come swing by our shop before this stuff is all gone, trust me, it goes fast!!
 |
| From Anacapa Knits |
We recieved more Merino Light, one of my favorites! It's 420 yards of lovely single ply Merino wool fingering weight goodness! I knit this shawl out of one skein of Merino Light in "Chamomile":
Here's a couple of my favorite colors that we just received:
 |
| From Anacapa Knits |
We also got more Pashmina, madelinetosh's wool, silk, and cashmere sport weight yarn:
 |
| From Anacapa Knits |
And last but not least is one we've never had: Prairie!
 |
| From Anacapa Knits |
Prairie is over 800 yards(!) of laceweight, plenty for a beautiful giant shawl! Come swing by our shop before this stuff is all gone, trust me, it goes fast!!
Monday, August 1, 2011
3 Easy Cast-Ons!
Today we're going to learn about casting-on! I hope you enjoy, and check out an upcoming Cast Ons and Bind Offs class taught by Anne, you won't be disappointed!
Subscribe to:
Posts (Atom)